A vehicle wrap changes the way a car, van, or truck looks the moment it goes on, and at some point every wrap has to come off too. Whether the design has run its course, the vehicle is being sold, or the business behind it is rebranding, wrap removal is a normal part of owning a wrapped vehicle. It’s also a step that gets far less attention than the installation itself, even though doing it wrong can cost more than the original wrap. This guide walks through what actually happens during removal, why timing matters, and what a shop offering real Car Wrapping Services in Elgin, IL should be doing differently from a shortcut job.
Most people research installation before they ever wrap a vehicle, comparing pricing, vinyl brands, and design portfolios. Removal doesn’t get the same amount of attention, mostly because it feels like a smaller, less important task. In practice, it’s just as technical, and the quality of the removal work has a direct effect on how the vehicle’s paint looks afterward. Anyone searching for Car Wrapping Services in Elgin, IL for a new project should keep removal in mind too, since the two are closely connected and often handled by the same shop over the life of a vehicle.
Vinyl wrap material is built to hold up against sun, rain, road salt, and daily driving, but it’s still a film applied to a painted surface, not a permanent part of the vehicle. Most quality wraps are rated for three to seven years depending on the vinyl grade, the laminate used, and how much time the vehicle spends outdoors. Past that point, the adhesive starts to break down on its own, and the film can begin lifting at the edges, fading unevenly, or cracking around body lines and mirrors.
Heat is usually the biggest factor. A car parked in direct sun for years absorbs a lot of that energy through the wrap, which slowly cooks the adhesive layer. Cold winters do the opposite kind of damage, making the vinyl brittle and prone to tearing if it’s flexed too much. Neither of these problems means something went wrong with the installation. It just means the wrap reached the end of its working life, and removal needs to happen before the adhesive turns into a much bigger cleanup job.
There isn’t one universal answer, but a few signs usually point to it being time:
Waiting too long after these signs show up tends to make removal harder. Adhesive that’s been baking in the sun for an extra year or two bonds more tightly to the clear coat, and that’s when residue and even paint damage become real risks. Acting sooner rather than later usually means a cleaner, faster removal.
Removing a wrap correctly is a slower process than most people expect. It’s not a matter of grabbing an edge and pulling — that approach almost always leaves adhesive behind or, worse, pulls up clear coat along with the vinyl.
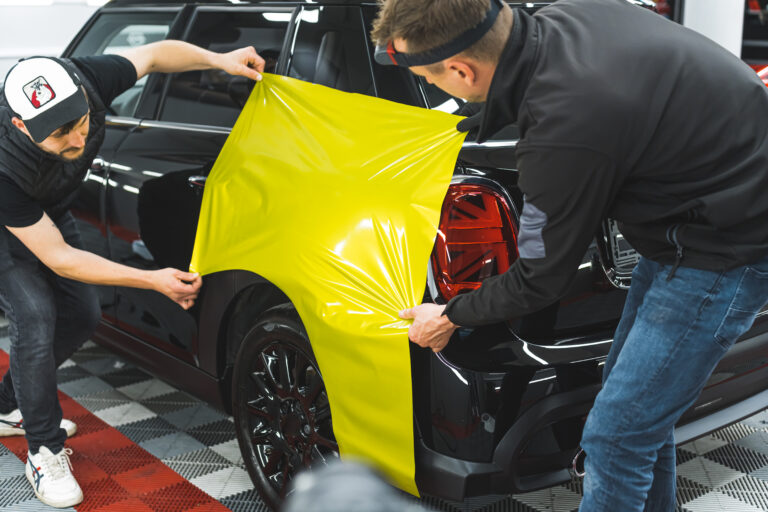
The typical process starts with heat. A heat gun or infrared lamp is used to gently warm the vinyl, which softens the adhesive layer underneath without damaging the paint. Once a section is warm enough, it’s peeled back slowly and at a low angle, keeping the film intact instead of tearing it into small pieces. Panel by panel, this continues across the whole vehicle, with extra care taken around curves, mirrors, door handles, and any area where the wrap was tucked or wrapped around edges.
After all the vinyl is off, there’s almost always some adhesive residue left on the paint. This gets removed with a dedicated adhesive remover or clay bar treatment, followed by a wash and, in most cases, a light polish to bring back the paint’s finish underneath. On a vehicle that’s been wrapped for several years, that paint has actually been protected from UV exposure and minor scuffs the whole time, so it’s common for the color underneath to look almost new once the residue is cleared away.
A full removal generally moves through the same core stages:
A lot of vehicle owners try removing a wrap themselves before calling a shop, usually to save money. It can work on small decals or short-term wraps, but full vehicle wraps are a different situation. Pulling vinyl too fast or at the wrong angle tends to snap it into small pieces, which turns a two-hour job into an all-day one. Using the wrong kind of heat, or too much of it, can also blister the paint underneath, especially on older factory finishes.
The other issue is leftover adhesive. Without the right products, people end up scrubbing at residue with things that scratch the clear coat, or they give up and drive around with a hazy, sticky film across the body for months. What looks like a simple weekend project often turns into a paint correction job that costs more than professional removal would have in the first place.
Weather adds another layer of difficulty that DIY guides rarely mention. Removing vinyl in a cold garage without enough heat makes the material stiff and prone to snapping, while working outside on a hot afternoon can soften the adhesive so much that it smears rather than lifts cleanly. Getting the temperature right, and keeping it consistent across a whole panel, is one of the harder parts of the job to get by feel alone. It’s also easy to underestimate how long full removal actually takes. A single panel might come off in a few minutes once the technique is right, but a full car, van, or box truck involves dozens of panels, curves, and tight spots around handles and trim, which adds up to several hours of steady, careful work rather than a quick afternoon project.
The most common DIY mistakes tend to repeat themselves:
One thing that surprises a lot of vehicle owners is that removal, done correctly, actually reveals paint in better condition than it would be without a wrap at all. The vinyl has been acting as a barrier against sun exposure, minor road debris, and everyday scratches the whole time it was on. Once it’s peeled away and the adhesive is cleaned off, that paint has often had years of UV protection it wouldn’t otherwise have had.
That’s part of why removal quality matters so much. Rushed or careless removal can undo that protection by scratching or lifting clear coat, while a slow, controlled process preserves it. For business owners planning to resell a fleet vehicle or reuse it under a new design, that difference shows up directly in resale value and how much prep work a new wrap needs.
There’s also a cost angle worth considering. Paint correction, from buffing out light scratches to full panel repainting, runs far higher than a professional removal job. A vehicle owner who pays a bit more for careful, methodical removal is usually avoiding a much larger bill down the line. This is especially true for leased vehicles, where the return condition of the paint can affect fees, and for company vehicles that are eventually sold or transferred to a new driver.
Every vehicle that comes in for wrap removal gets looked at first, since the right approach depends on how old the wrap is, what kind of vinyl was used, and how it’s holding up. A wrap that’s two years old and still fairly flexible removes differently than one that’s been baking in the sun for six years and has started cracking.
From there, the process follows the same core steps every time: controlled heating, slow panel-by-panel removal, adhesive cleanup, and a final wash and inspection. Vehicles that are being re-wrapped go straight into design and installation once the surface is clean. Vehicles being sold or returned to their original color get a closer inspection to check for any spots that need extra attention before they’re handed back.
Fleet vehicles get a bit more coordination, since businesses usually want minimal downtime and consistent results across multiple trucks or vans. Scheduling several vehicles together, rather than one at a time, tends to keep a fleet on the road with less disruption.
Not every wrap removal ends with a bare vehicle. A lot of the time, it’s the first step toward something new — an updated logo, a color change, or a full rebrand. In that case, removal and reinstallation get planned as one project, so the vehicle isn’t sitting unwrapped and unbranded for weeks in between.
For vehicles going back to their factory paint permanently, the priority shifts toward getting the paint as close to its original condition as possible, since there won’t be a new layer of vinyl covering any imperfections. Either way, the removal step sets the foundation for whatever comes next, which is why it’s worth treating as its own project rather than an afterthought tacked onto a new wrap order.
Businesses updating their branding often use this window to rethink more than just the color scheme. A logo that’s been the same for years, a phone number that’s changed, or a service list that’s grown since the original design was made are all easier to fix during a full re-wrap than to patch onto an existing one. Since the vehicle is already stripped down to bare paint at that point, it’s a natural moment to start the new design from scratch instead of working around whatever was there before.
Not every print or sign shop that installs wraps is set up to remove them properly, and that gap shows up more often than people expect. Removal takes different tools, more patience, and a better understanding of how vinyl and adhesive behave as they age. A shop that only knows installation may rush the process or skip the paint-safe techniques that prevent damage. Browsing a shop’s past work on Facebook is a simple way to see whether their experience actually covers both sides of the job.
When comparing options for Car Wrapping Services in Elgin, IL, it helps to ask directly about their removal process, not just their installation work. A shop that can walk through how they handle heat application, adhesive cleanup, and paint inspection is usually one that’s done this enough times to know where things can go wrong. It’s also worth asking whether they handle both removal and new installation, since coordinating both under one project tends to be smoother than switching between two different providers.
MYA Graphic works with vehicle owners and fleet managers across Elgin and the surrounding area on both sides of this process — putting wraps on and taking them off cleanly when it’s time for something new. The same attention that goes into a fresh install carries over into removal, since the goal on both ends is the same: a vehicle that looks the way it’s supposed to, without hidden damage underneath.
If a wrap on your vehicle or fleet is showing its age, cracking at the edges, or just ready for a new look, getting it removed the right way now saves a lot of trouble later. Reach out through our contact page to talk through your vehicle, your timeline, and what a clean removal — or a full re-wrap — would look like for you.
